Inventor Tip – How to retrieve Dimensions and Edit a 3D Part from your 2D Drawing
In line with a traditional workflow most Inventor users are likely familiar with the process of modelling a 3D part, producing a 2D drawing of that part, and then populating their new drawing with manually placed dimensions. Following this, when our part needs amending or editing for whatever reason, we edit the 3D model and our drawing updates accordingly: dimension values, drawing views and linked annotations all update automatically. On the face of it this all makes perfect logical sense, and there is in fact nothing wrong with working in this way. However, this is by no means the only way to detail a part, and by using Inventor’s ‘Retrieve Dimensions’ tool we not only save time when it comes to placing dimensions on a drawing, but gain the capability to edit the parameters of our 3D model within the 2D drawing workspace.
For the purposes of this tutorial we will assume you already have a part modelled and a view of it placed on a drawing, your graphics area will, apart from the border and view of the part, look very similar to the image below.

At this stage, ensuring you are working under the ‘Annotate’ tab in the drawing workspace, locate the ‘Retrieve’ tool button, by default it is found alongside your other dimensioning tools. What this feature allows us to do is retrieve the dimensions we defined when making our model, and use them to populate our drawing.

Once clicked you will see the following dialogue box appear.
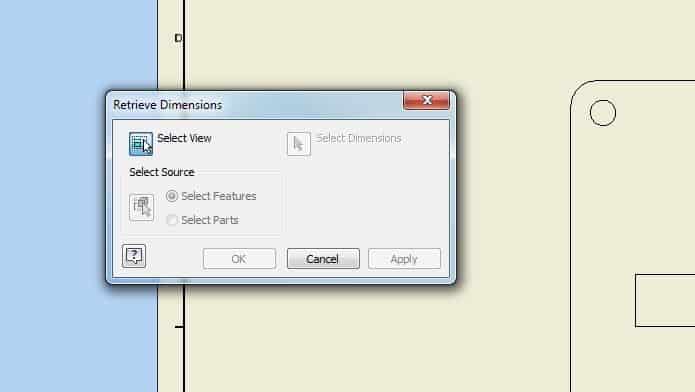
Select the drawing view you would like to populate with dimensions. Then, with the ‘select features’ option active, begin to click on the features that make up your 3D part. In our example I have clicked on an edge of the plate (an extrusion in the model), one of the holes, and the cross-shaped cut-out in the middle. Lastly, using the ‘Select Dimensions’ arrow, I have then highlighted the retrieved dimensions I want to place before applying the operation (in this instance I have opted to keep all the retrieved dimensions).
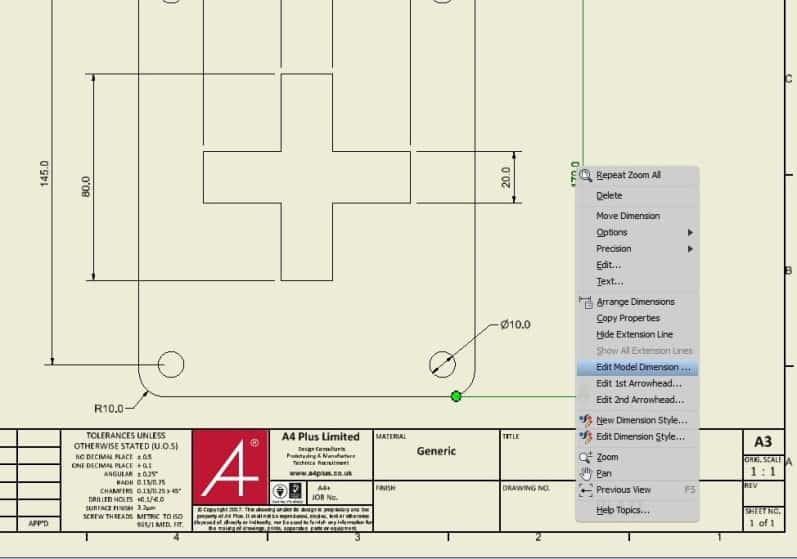
With some quick layout and spacing adjustments, your drawing view should now look something like the image below – all of it done in a fraction of the time it would have taken had each individual dimension been manually placed.

This increased speed in terms of placing dimensions is only half the benefit however; as what we can now do is use our retrieved dimensions to directly edit the geometry of our 3D model. This is done my right clicking a retrieved dimension, selecting the ‘Edit Model Dimension’ option, and then typing your new value into the edit parameter box.